Installing and Setting up TASLink
You can find details of how to install TASLink via the Installation Guide. The SDK Control Centre allows TASLink to be set up for multi-company and multi-user operations. Each user can be assigned specific rights for each company.
Using TASLink in VB projects
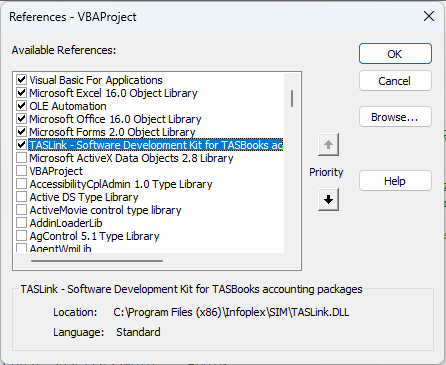
Adding the TASLink Reference to VBA projects
Add TASLink to your project references to enable early binding (see below regarding binary compatibility).
Binary Compatibility & Binding
Binary Compatibility
TASLink has been created using binary compatibility and it is expected that this compatibility will be maintained for the foreseeable future. In the event that binary compatibility is broken, developers who have valid maintenance contracts and have opted in to receive email correspondence will be notified by email. Depending on the Binding option you have selected for TASLink, you may then need to relink TASLink to your project references.
Binding Tip
Sometimes, e.g. as a result of enhancements, Infoplex may release versions of its components which are binary incompatible with earlier releases. Depending on your development and deployment environments, and subject to certain provisos, you may wish to bind late (also known as dynamically) to whichever TASLink object release happens to be installed. This removes the need to recompile your application should binary compatibility be broken.
However late binding in an Integrated Development Environment (IDE) may disable helpful context-sensitive dropdowns, such as IntelliSense, and automatic checking for syntax errors, which are enabled by using early binding (also known as static binding) to components. The downside of early binding is that your project is version-dependent, i.e. it is hard-wired to the specific binary interface of the referenced component. This tip shows how, using compiler constants, it is possible to get the best of both worlds without too much extra work.
When coding in the IDE, you can make this constant = 1 and add a reference to the component.
Before compiling, set this constant = 0 and remove the reference to TASLink in your project. Now you can write code that is dependent on this constant (remember to use a 4 byte integer in place of any enumerations in the component), for example:
Private Sub Test()
	#If UseEarlyBinding = 0 Then
		Dim objProducts As Object
	#Else
		Dim objProducts As TasLink.Products
	#End If

	objProducts.SortBy = 1 'ProductSortOptions.ProductCode
	'do some processing
	Set objProducts = Nothing
End Sub
We recommend, too, that your code checks the version of TASLink, using the TasLinkVersionMajor and TasLinkVersionMinor properties of the TASBooksAccountingCompany class.
TASLink in the VBA Object Browser
Press F2 and select TASLink from the Libraries dropdown menu to display the TASLink objects, properties and enumerations in the Object Browser.
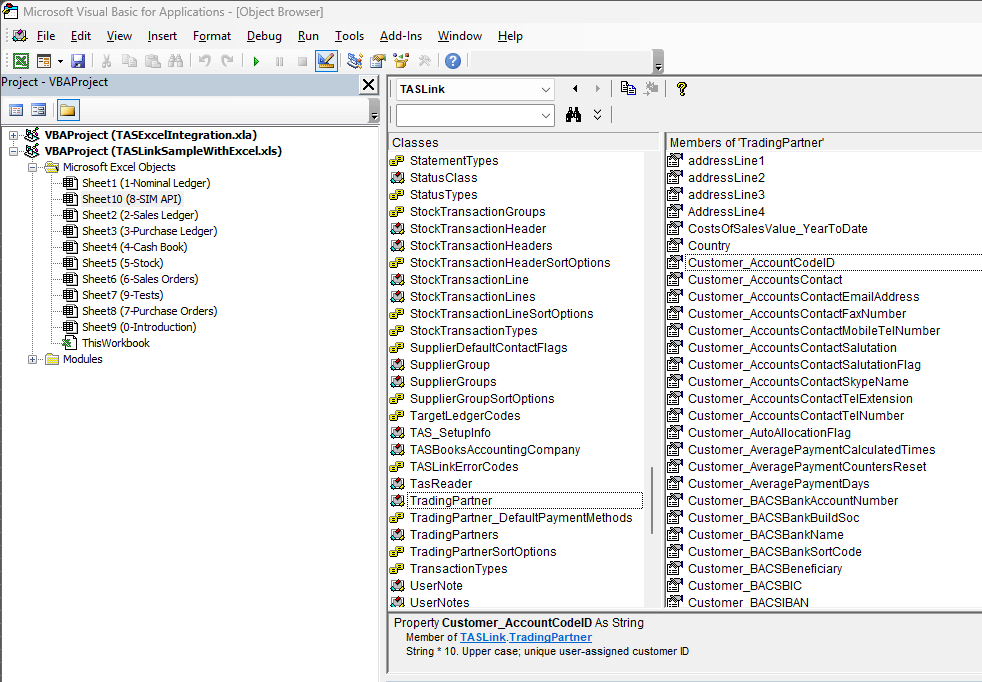
Note that properties are described in some detail in the bottom section.
Sample Code & Spreadsheet
You can find plenty of sample code in the Setup and Login for the TASLink Object section and subsequent Working with sections below, as well as in the sample spreadsheet TASLinkSampleWithExcel.xls, which is installed in your local SIM home documentation folder (by default C:\Program Files (x86)\Infoplex\SIM\Docs or for 64-bit computers C:\Program Files (x86)\Infoplex\SIM\Docs). To use the spreadsheet you must have completed the full Installation and Setup as described in the Quick Start section above. The spreadsheet contains many worksheets each with several working examples, which relate to the standard TAS Demonstration Company (tutorial data) and which illustrate a small number of the huge range of possibilities available.
.NET Considerations
There is an important point to note when developing in .NET. Due to the way in which TASLink handles its resources internally and to the way in which .NET uses the garbage collection to release resources automatically, the following rules should be followed: 1. Objects created by TASLink should be released as soon as they are no longer required, instead of waiting for the garbage collection because this may not happen until your application ends. 2. When releasing objects, you should manually release the object (and its resources).
Below is some sample code which lists all customers from a TAS dataset.
Private Sub ListCustomers()

	Dim objCustomers As Object = Nothing
	Dim objCustomer As Object = Nothing
	Dim Counter As Integer

	Try
		objCustomers = _SDK.TradingPartners
		objCustomers.IncludeSuppliers = False
		objCustomers.SortBy = 0 'TASLink.TradingPartnerSortOptions.CustomerCode

		For Counter = 1 To objCustomers.Count
			objCustomer = objCustomers.Item(Counter)
			Debug.WriteLine(objCustomer.Customer_AccountCodeID & ": " & objCustomer.Name)
			KillComObject(objCustomer)
		Next

	Catch ex As Exception
		MsgBox(ex.ToString)
	Finally
		KillComObject(objCustomer)
		KillComObject(objCustomers)
	End Try
End Sub
Public Sub KillComObject(ByRef comObject As Object)
Try
If Not comObject Is Nothing Then
Do While System.Runtime.InteropServices.Marshal.ReleaseComObject(comObject) > 0
Loop
comObject = Nothing
End If
Catch ex As Exception
'do something
End Try
End SubSetup and Login for the TASLink Object
To establish a database connection, declare a new instance of the TASLink TASBooksAccountingCompany object, the root Application object in our object model. Set its Path and Login properties:
Dim oSDK As TASLink.TASBooksAccountingCompany
Dim sTAS_DataPath As String
Dim sUserName As String
Dim sUserPassword As String
The physical location of the database is established by setting the Path property of the TASBooksAccountingCompany object and then assigning the user name and password:
sTAS_DataPath = "C:\TAS Books 3\DEMO1"
sUserName = "ADMIN"
sUserPassword = "ADMIN"
Create the new instance of the object:
Set oSDK = CreateObject("TASLink.TASBooksAccountingCompany")(If you have used early binding, as above, you could alternatively write: Set oSDK = New TASLink.TASBooksAccountingCompany)
The Licence Type property defaults to Unspecified and, normally you would not need to set it. At runtime you can read this property to determine whether your application is using TASLink or TASflex. If you wish to explicitly enforce that either a TASLink or a TASflex licence be used for your application e.g. when you make your application release (as opposed to debug), you can set the value to RuntimeLicence before calling the Login routine in the next step:
oSDK.licenceType = RuntimeLicence
'oSDK.licenceType = DeveloperLicence
'oSDK.licenceType = Unspecified (default)
then use the Login routine to establish a User and to verify that the User has the relevant permissions:
oSDK.logIntoTASDataset sTAS_DataPath, sUserName, sUserPasswordYou can use the Status object to check that all is OK or not, as the case may be:
If Not oSDK.Status.successful Then
	MsgBox "Login problem: " & oSDK.Status.userReadableDescription
	'go off and sort out the problem
End If
NB: If the licence type is Unspecified then the oSDK.Status.userReadableDescription will be populated with 2 possible reasons why you could not log in.
Getting Company Setup details
Once a valid data connection has been established, as described in Setup and Login for the TASLink Object, you can get basic information you may need through the TAS_SetupInfo object. It is important to note that any call to get a property from the TAS_SetupInfo object re-reads the related TAS records in case any changes have been made since it was last read during the session.
Dim oSetup As TASLink.TAS_SetupInfo
Set oSetup = oSDK.TAS_SetupInfo
You can find out some key defaults about TASLink and the TAS Company.
Debug.Print "Company Name: " & oSetup.Company_Name & vbNewLine & _
"TASLink version: " & oSDK.Version & "." & oSDK.Build &
vbNewLine & _
"Current Sales Ledger Date: " & oSetup.SalesLedgerDate &
vbNewLine & _
"Default Sales NL Account: " &
oSetup.NominalAccountNumber_SalesDefault & vbNewLine & _
"Default NL Department: " &
oSetup.DefaultNominalLedgerDepartmentCode
To determine whether a particular date falls with the Company’s 5-year Financial Calendar and into which Financial Year and period the date falls, use the DetermineYearPeriod method:
Dim sFinancialYear As FinancialYears
Dim lnFinancialPeriod As FinancialPeriods
Dim dADate As Date
Dim sFinancialYearDescription As String
dADate = CDate("15/01/2005")
If oSetup.DetermineYearPeriod(dADate, sFinancialYear, lnFinancialPeriod) Then
	Select Case sFinancialYear
		Case 0
			sFinancialYearDescription = "Current Year"
		Case 1
			sFinancialYearDescription = "1 Year Past"
		Case 2
			sFinancialYearDescription = "2 Years Past"
		Case 3
			sFinancialYearDescription = "3 Years Past"
		Case 4
			sFinancialYearDescription = "4 Years Past"
	End Select

	Debug.Print dADate & " is in " & sFinancialYearDescription & " Period " & lnFinancialPeriod
Else
	Debug.Print dADate & " is not within the Company's 5-Year Financial Calendar"
End If
An Accounting Period’s start date and end date can be accessed through the GetPeriodStart and GetPeriodEnd methods:
Dim Period9Start As Date
Dim Period9End As Date
Period9Start = oSetup.GetPeriodStart(CurrentYear, Period9)
Period9End = oSetup.GetPeriodEnd(CurrentYear, Period9)
Debug.Print "from " & Period9Start & " to " & Period9End
You can determine whether a particular Financial Period is closed by using the IsPeriodClosed method:
If oSetup.IsPeriodClosed(SourceLedgerCodes.SalesLedger, CurrentYear,
Period1) Then
Debug.Print "Current Year, Period 1 is closed"
Else
Debug.Print "Current Year, Period 1 is open"
End If
Working with the Chart of Accounts
Nominal accounts can be accessed through the ChartOfAccounts object. The ChartOfAccounts object exposes standard TASLink Collection properties and methods which are used to navigate the collection and retrieve the ChartOfAccount object we require. First create a valid data connection (see Setup and Login for the TASLink Object). Now create a reference to a ChartOfAccounts object and set it to the ChartOfAccounts object exposed through the TASLink object model.
Dim oChartOfAccounts As ChartOfAccounts
Set oChartOfAccounts = oSDK.ChartOfAccounts
You can now get access to the current ChartOfAccount object in the collection.
Dim oChartOfAccount As ChartOfAccount
Set oChartOfAccount = oChartOfAccounts
You can set the order in which ChartOfAccount objects are presented to you, in this case by Nominal Account number and Nominal Department code:
oChartOfAccounts.SortBy = AccountNumber_AND_DepartmentNumberThen find a particular ChartOfAccount object based on the Nominal Account number and Nominal Department code:
Dim CurrentYearProfitAndLossAccountNumber As Long
Dim DefaultDepartmentCode As String
(use the method described in Getting Company Setup details to get these details), then you can provide the values:
Debug.Print "Nominal Account: " & oChartOfAccount.AccountNumber & _
"-" & oChartOfAccount.DepartmentCode & vbNewLine & _
oChartOfAccount.Name & " balance: £" & _
Format(oChartOfAccount.GetNetAmount(CurrentYear,
YearTotal), "0.00")